This is a topic that used to scare me. The first few times that I tired royal icing transfers, I failed. Miserably. It was frustrating and I felt defeated. So, I researched and tried again and again. As usual, all my sweet friends over at Cookiers R Us has the answer: page protectors!
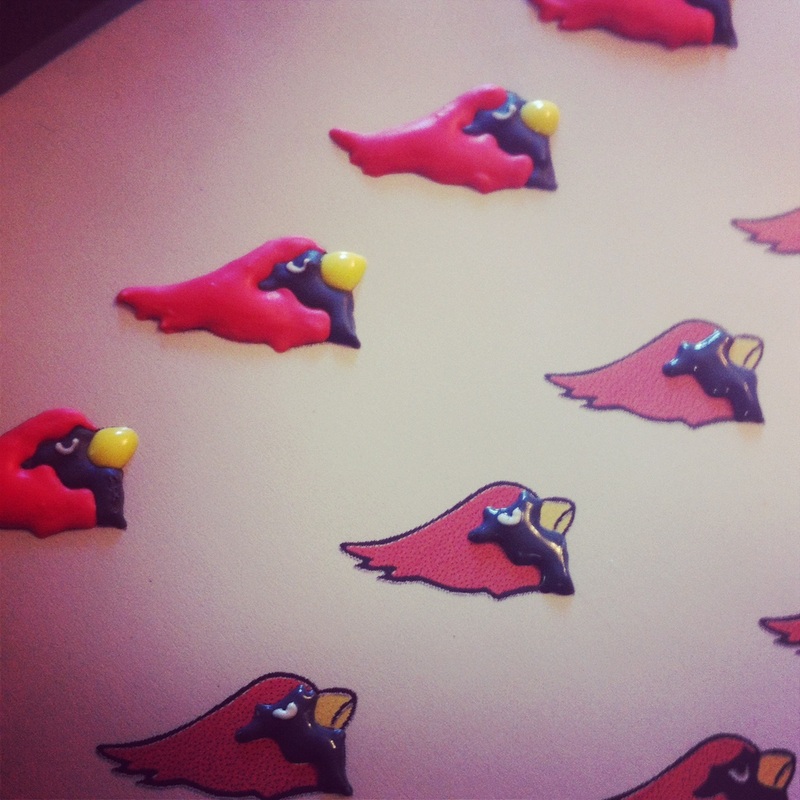
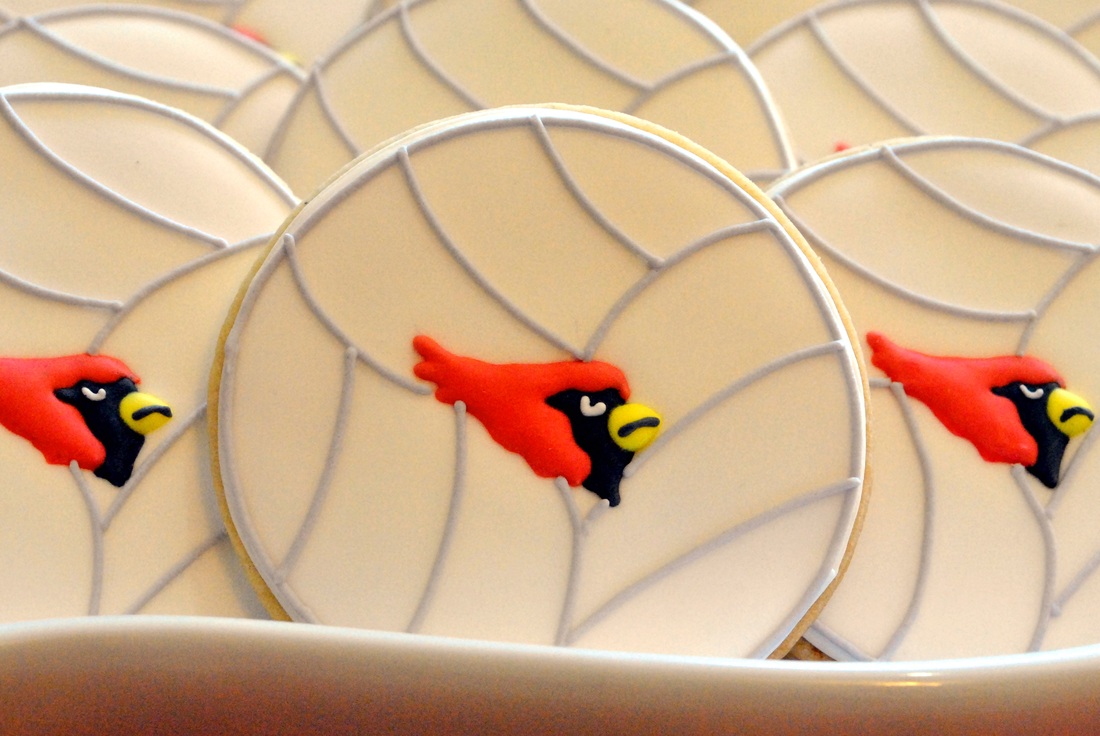
The anchor cookies are one of the first royal icing transfers I tried. Sit back and I'll tell you the saga that ensued... The night before I was going to decorate the cookies I printed out my anchor designs, put wax paper over the paper on a cookie sheet and piped away. I was sssoooo smart and put them in the oven to keep them 'safe' from dust, knocking off the counter etc. The next day I preheated my oven to do some non-cookie cooking... and a little while later I smelled burning plastic. Yep. The wax paper was melting onto my cookie sheets and the transfers burned to a crisp and were ruined. I had to quickly make new ones and only had about 6 hours to let them dry. Y'all, that's NOT long enough! They ALL broke and I had to piece them together. Very frustrating. Needless to say, there were a lot of very valuable lessons learned that day. Let's talk now about what you should do:1-make your design the size you need (you can do this is in a number of computer programs, whatever works for you) and then print it out2-slide your paper into a clean page protector and put this on a cookie sheet or other flat, easily moved surface (bonus for using the page protectors, you can slide that puppy right into your Cookie Book when you're done, never know when you might need that design again!)3-pipe over your design, I like to use 15 second icing, thinner than that and you will get more breakage4-let them dry at least overnight5-very slowly and carefully peel the page protector away from the transfer. If you've let them dry long enough they should pop right off with no problems! Just go slow, start at one edge and work your way across the page and don't worry if one or two break, it is inevitable. (Everyone has a slightly different technique for doing this, and I'm going to be annoying and say that you'll find what works best for you and what 'feels' right.) Below you can see an example of some cardinals I have done a few times. I usually fill in the black for about 8-10 of them and then go back and do the white on the eye, there is less bleeding if you wait just a minute or two. After waiting 10-15 minutes (again to avoid bleeding, black can be a bit tricky that way) go back through and add the red feathers and yellow beak. After you've let them dry overnight, it's time to put them on your cookie. Flood your cookie and wait a few minutes before dropping on the transfer, this will reduce the change of bleeding. This a much bigger concern when doing cookies where are dropping a dark color transfer onto a white background. Because I am super paranoid after making past mistakes, I will usually put them under a fan to help speed up the drying time, so far this has prevented any bleeding issues.
Once you place them on the cookie, you do have a little bit of time in which you can nudge them around a bit to get the positioning correct. You can't move it too much, but a little touch here and there can help you center and straighten them. One last tip for you: make more than you need. There will be breakage, it is unavoidable, especially with smaller, more intricate designs. There is nothing more frustrating that having to piece together transfers or having that last one break on you and not having any extras! If you do have extras, put them in a sealed container and save them for future use! Also, don't turn on your oven if you're using it for 'storage' purposes...it ends badly :)
As always, it's your turn! What are you tricks or tips to getting your royal icing transfers to work?
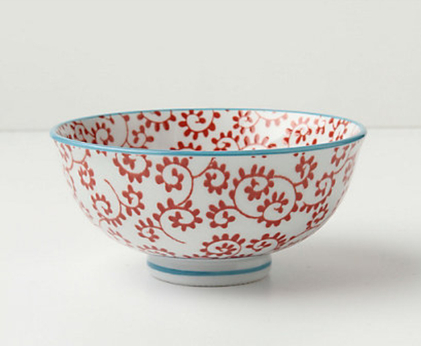
Cookie inspiration. There are some amazingly, incredible, over the top talented cookie artists out there. I use the word artist very purposefully. These people are able to transform a sweet treat into something gorgeous and truly artistic. A lot of people can create wonderful designs solely on their own. I, however, usually need a little help.There are a few places that I go when I'm stuck. I find myself spending more and more time looking at greeting cards now, with little intention of buying them. There are a lot of cards with very cute designs that I can use to spark my imagination. I also go to the Tiny Prints website, frankly, it's a lot easier for me to look at cards on my couch than with the two kids in tow at the store! This Christmas I also found myself wandering the rows of Christmas ornaments at Hobby Lobby looking for fun designs. Once you start looking for inspiration, you'll be amazed where you can find it! This month, Lila Loa posted a new cookie challenge that I've decided to enter. The challenge is to sketch your cookies before you make them. As you remember from my Cookie Book post, I've definitely got that covered! For this challenge I decided to peruse the Anthropologie website to see if anything there inspired me. For this particular challenge, I decided to base my designs on this bowl. I liked the color combination but wanted to make the blue a little more turquoise and the red a little more orange. To make it a little more of a challenge I limited myself to those colors and
white for backgrounds. (I'll admit though, in some ways limiting the colors makes it easier, any one who has made cookies with 6 colors of icing knows it can be a lot of work!)
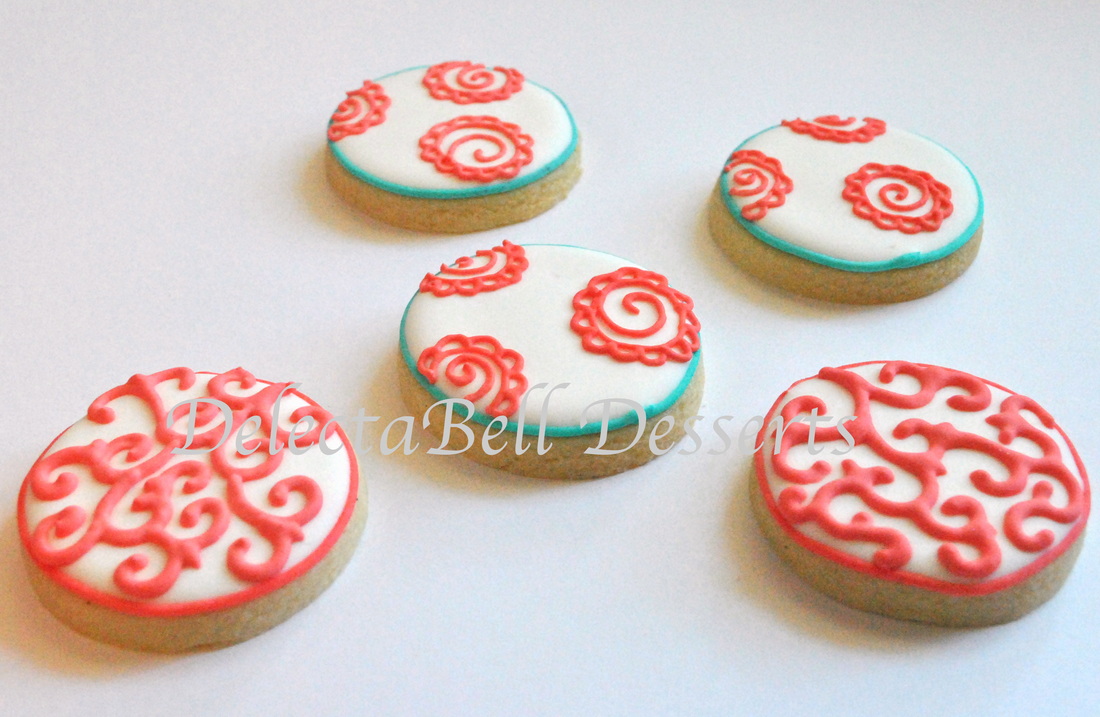
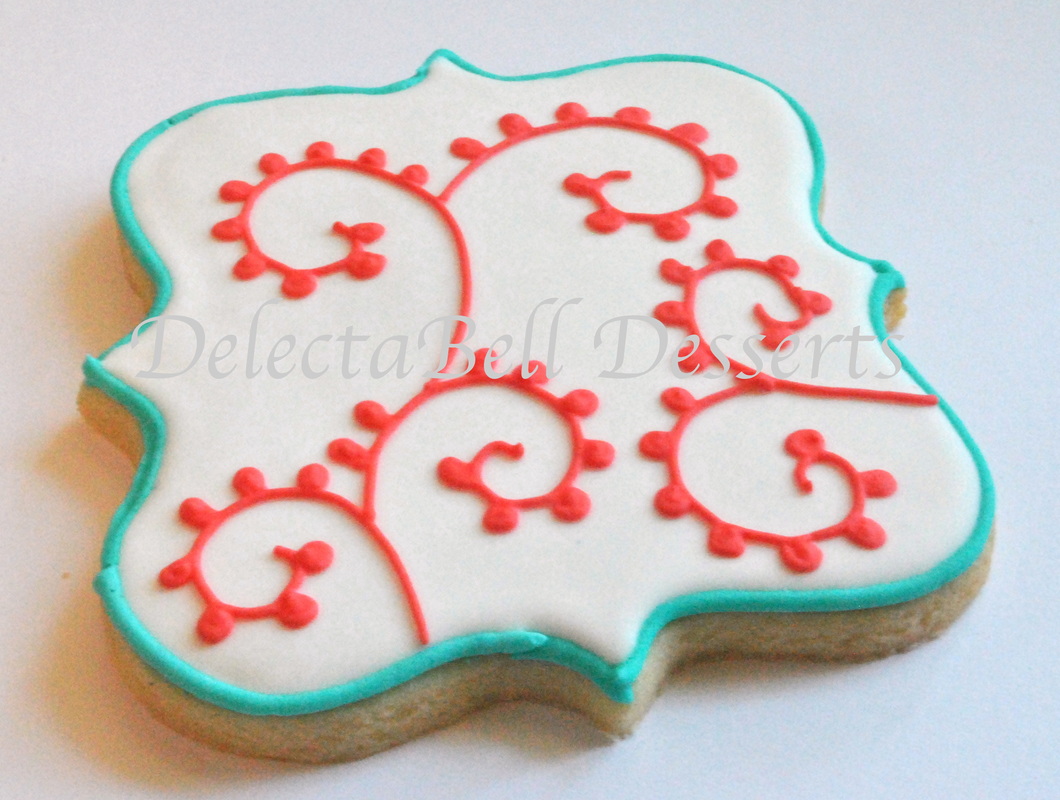
It was fun to do something a little different and more abstract that I usually do. Hope you enjoy them!  Anthropologie inspired cookies Couldn't decide if I liked the rectangle or square center cookie better, so I just posted them both! The cookies on the ends with the pattern in the opposite colors were a design I randomly saw on google images that I can't find again for the life of me. And the top and bottom cookies with scrollwork are from a chair back that I saw and loved. 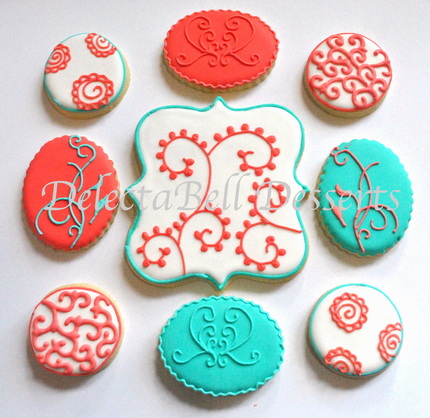 Anthropologie inspired cookies The cookies with the swirly things (really not sure what to call them) were another pattern from Anthropologie. Thanks for the great challenge this month, Georganne! Can't wait to see what you have in store for us in March!
Your turn! Where do you get your inspiration? Are you able to just sit and design something or do you like to peruse other mediums and pull from there?
Is it just me, or do all cookie newbies do this? When I started decorating cookies I used only one kind of tip. No, this isn't a post about the fantastic-wonderful-amazingness of PME tips (all true, I assure you) but the shape of the tip. When I started out I used only round tips. Sure, I changed up the size of the tip but honestly, I only used round tips. It really never dawned on me to use anything else, and in hindsight, I wish I had thought of it much sooner.
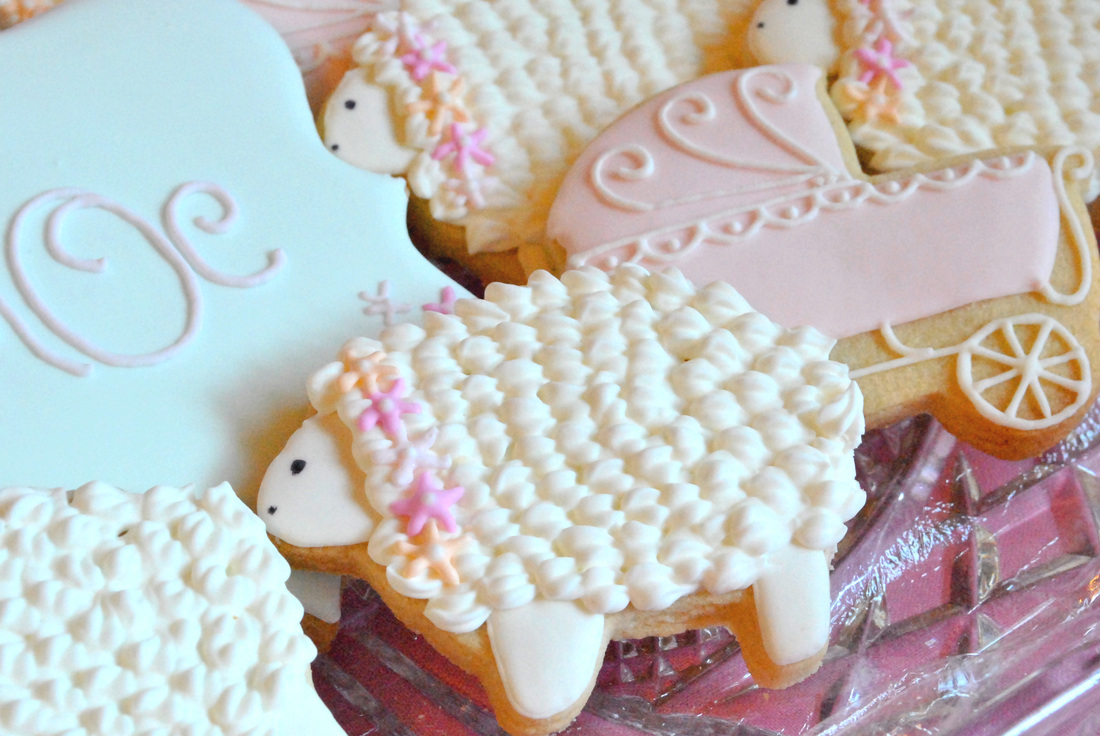
The first time I used something other than a round tip was to do these little lamb cookies for a baby shower cookie plate. I saw these adorable lambs from Marian at Sweetopia and I couldn't wait to try them! I won't go through the steps to do them (check out the link for that), suffice to say I used a Wilton #16 tip. It was an easy way to add dimension and texture. Around Christmas-time this year, I was asked to make some cookies for an auction benefiting the choir at one of the local high schools. The theme was something along the lines of Winter Woods, so I wanted to make some simple scenery cookies. I knew that plain triangles for the trees would look too flat and one dimensional, so I decided to again break out of my round-tip-rut and used a Wilton #16 tip.
It was simple enough: pipe a long row for the bottom branches, then add rows of decreasing numbers until you reach the top. If you've never used this kind of tip before, it's pretty simple with a little practice. Squeeze out a bit, release the pressure and pull back. Repeat. The only thing I will add to this is to remember to use very stiff, piping consistency icing. It should hold a peak when you pull a spoon out of it, otherwise, you won't get the dimension and texture you are going for.
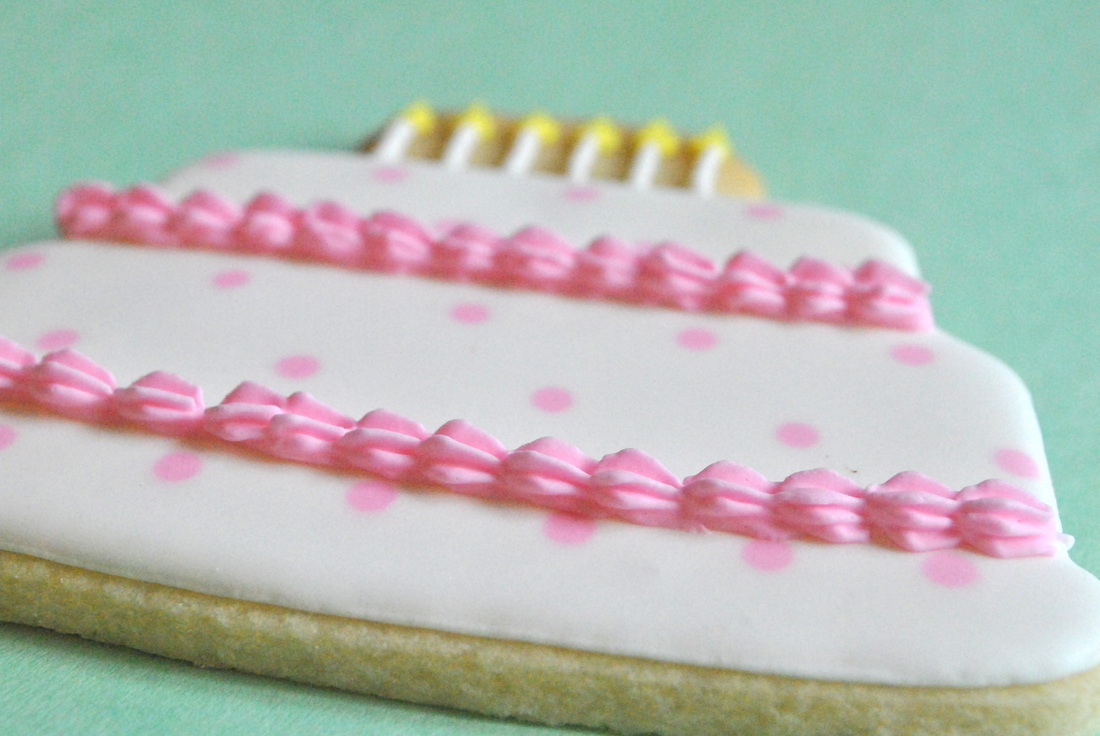
I wish now that I had been blogging then and had taken better pictures of the trees to show you...sorry! I was recently asked to do some birthday cake cookies and I knew that do truly make it look like a cake, it would need some details to make it more three dimensional. Broke out the trusty Wilton #16 tip again to pipe the shell boarder between the layers. Geez, that bottom line is a bit (lot) wonky, huh? That's probably why this was in the left-over group.
**Random tip of the day: when making cookies for a customer, always, always, always, always make extra!! You never know when one will drop on the floor or you will mess something up (see above wonkiness). It is also good to have a few practice cookies to make sure your design is going to work how you want, or use them to get the spacing and size of your writing correct. And your husband and kids will thank you for that night's dessert :) **
Anyway, where was I? Seriously lost my train of thought because Boy #1 was napping on the couch beside me and fell off. Don't worry, he's fine. He's now sleeping on me, guess that's slightly safer.
Tips. Yes. Once again, use very stiff icing for this, you need it to hold it's shape. Now, this time I was a good little blogger and took a closeup of the border! Yay, me! Isn't it pretty? See how it stands up and adds depth?
It really doesn't take much to make a big change in a cookie. For the birthday cakes, I could have piped a straight, thick line but for about 10 seconds more work I think it looks much nicer.
There are endless options for using different tips to add details to your cookies. So, go play around and see what you can create, and get out of your round-tip-rut!
(So let me have it, was I the only one who didn't think of this when they started cookie-ing?!)
I'm trying some mobile blogging today, pictures and blog all done with my phone :) isn't technology wonderful?
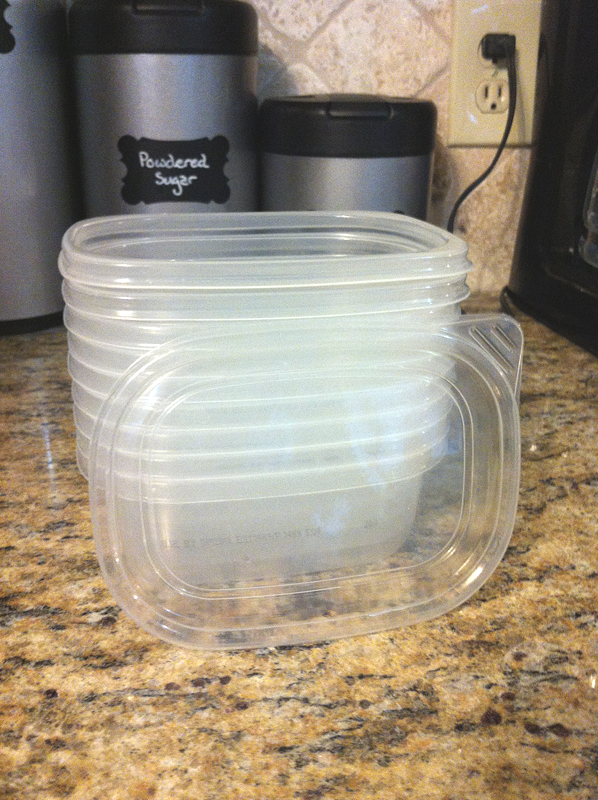
Today's WFMW post today is a quick one on storing royal icing. As you all know, it dries pretty quickly (unless it is 100% humidity like it often is in Houston). So you need to keep it sealed up between making it and using it so it doesn't dry out.
Here's my cheap way to store it: Yep. Those are former lunch meat containers! After we are done with them they get scrubbed and washed and recycled into royal icing containers. They're a great size, seal nicely and you can write on the top with a Sharpie to remind you what color you are supposed to make. The writing will wash off as well! They store easily and stack nicely when in use.
So, look around and see if there's something you already have that you can use. No point in wasting perfectly good containers!
I'm sure most of y'all are like me, you love shopping for cute new cookie cutter. I don't have nearly as many as some people but my collection is definitely growing! But what do you do when you get a last minute order and you don't have the cutter you need? Most of us will really try to fit them into our schedule and want to do our best to make client happy. Many local stores carry cookie cutters but it seems like the last minute orders always require cutters they don't have. So do you buy a new cutter and pay a boat load in expedited shipping costs? That can really cut into your profit, personally, I'm not willing to pay $15 to get a $1.50 cookie cutter in two days when there are other options to work with.
So, lets talk about quick options to make the cookies your client needs:
1-make a template and hand cut the cookies
2-high jack a cutter you already have and think outside the box
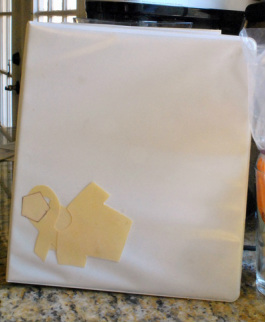
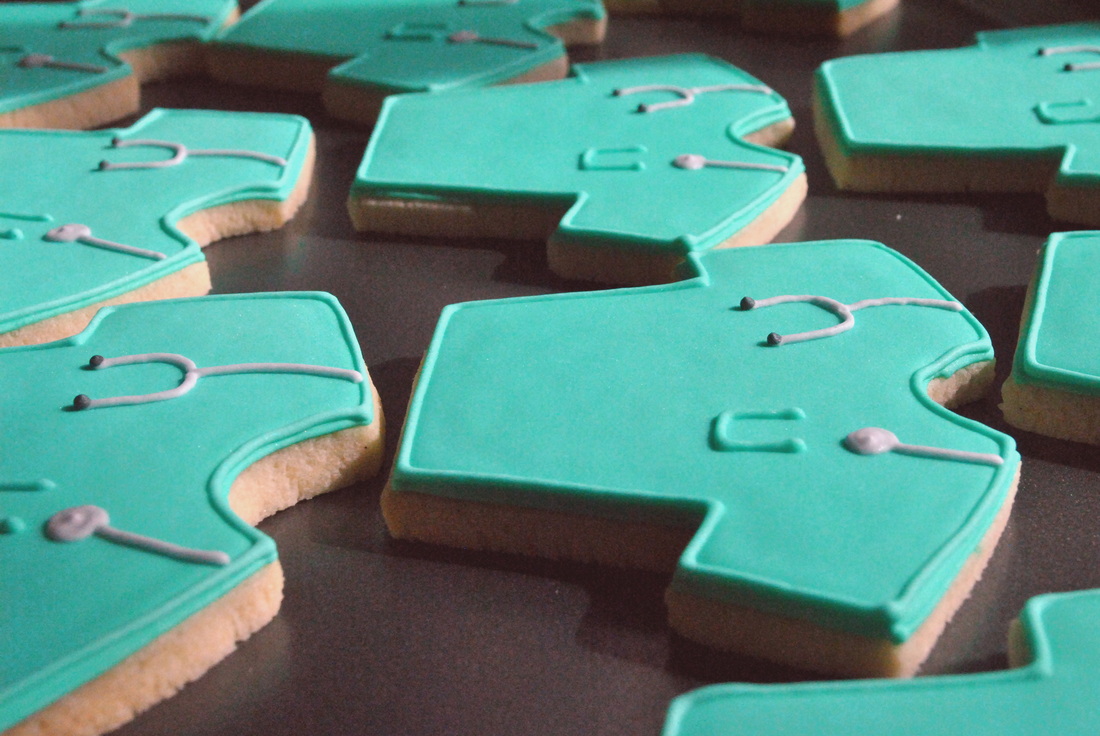
Option 1:We'll start with hand cutting. Bridget at Bake at 350 blogged about this and I've done it on more than one occasion. Basically, you draw the shape on something that is stiff, like a manilla folder, cut it out and then use that as your template. Place it on your rolled out cookie dough and use a good knife to cut around it. This is obviously waaaay more time consuming than using a cookie cutter but it works great! You can also save your template and re-use it as needed. If you read my last blog, you'll remember seeing some shapes in the front pocket of my Cookie Book. You can see the template in the above picture for my scrub shirt with stethoscope cookies, I have yet to find a cookie cutter that has dimensions that are to my liking. Yes, it takes a while to hand cut 3 dozen of these but in the end I am happier doing this than messing with a shape I don't really like.
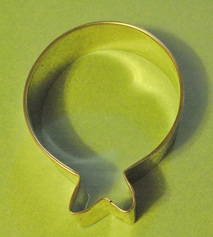
Option 2:The second option is to high-jack a cookie cutter you already have. Now, in my opinion Calleye over at The Sweet Adventures of Sugarbelle is the masters of this. She has an amazing ability to think outside the box and use the cutters that she already has in wonderfully creative ways. This is a talent I am trying to develop and I'll show you an example below.When I first picked up this cookie cutter from Sur la Table, I honestly thought it was a pomegranate. Seriously. My husband is an avid fruit grower (check out his incredible blog!) and I think at that time we had been enjoying the poms he grew. Anyway, I was going to make some fruit themed cookies for his friend and I saw this and thought "oh, wow! I can't believe they make a pomegranate shaped cookie cutter!"...it was in the same bin as the apple, pear etc cutters so it's a conclusion anyone would make, right? Unfortunately, I can't find any pictures of those cookies, but they didn't turn out how I wanted anyway, so maybe I just trashed them :) Anyway, if you can't tell by now, this is clearly supposed to be a balloon cookie cutter. (yes, it's a horrible picture, I'm using the excuse of kids being sick...that's always a valid excuse, right?) 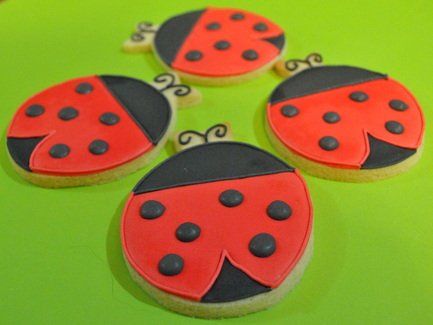 Ladybugs I was pleased with how they turned out but all I could think while cutting out the cookies was "these aren't ladybugs, clearly these are blowfish!". How convenient that my son's birthday party was coming up, he wanted a "shark party" but was happy with the idea of "sea creature" cookies to go along with it. Sharks, as it turns out, are hard for me...he's very understanding for a 4 year old. 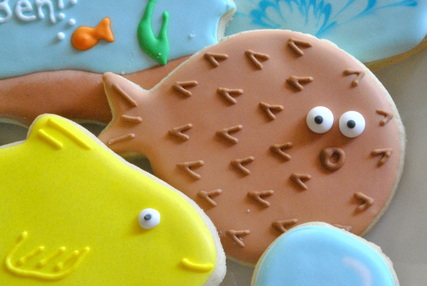 Blowfish cookie I decided that simple would be best for these cookies (this ends up being true for a lot of cookies). I flooded with brown icing, let him dry for the day and then added his spines and mouth using a slightly darker brown. Used a little white to pipe on some eyes and dot them with black icing while the white was still wet. Then I gave him wide eyes and a round mouth to make him look surprised at the fact that you might eat such an adorable little guy :)
Pomegranate, balloon, ladybug, blowfish, all from one 76 cent cookie cutter! The possibilities are really endless when you use your imagination. As I said before, I'm still a relative newbie to all of this and am still working on stretching my imagination with it comes to these things. Hopefully I'll have more fun with this cutter in the future!
Now it's your turn: how have you used your cookie cutters to make something new? Feel free to post a link to your blog to show off your work!
|


 RSS Feed