I'm sure most of y'all are like me, you love shopping for cute new cookie cutter. I don't have nearly as many as some people but my collection is definitely growing! But what do you do when you get a last minute order and you don't have the cutter you need? Most of us will really try to fit them into our schedule and want to do our best to make client happy. Many local stores carry cookie cutters but it seems like the last minute orders always require cutters they don't have. So do you buy a new cutter and pay a boat load in expedited shipping costs? That can really cut into your profit, personally, I'm not willing to pay $15 to get a $1.50 cookie cutter in two days when there are other options to work with.
So, lets talk about quick options to make the cookies your client needs:
1-make a template and hand cut the cookies
2-high jack a cutter you already have and think outside the box
Option 1:
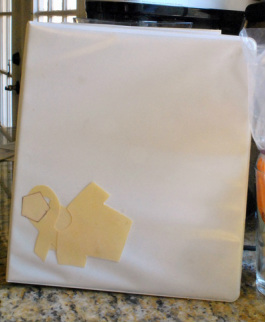
We'll start with hand cutting. Bridget at Bake at 350 blogged about this and I've done it on more than one occasion. Basically, you draw the shape on something that is stiff, like a manilla folder, cut it out and then use that as your template. Place it on your rolled out cookie dough and use a good knife to cut around it. This is obviously waaaay more time consuming than using a cookie cutter but it works great! You can also save your template and re-use it as needed. If you read my last blog, you'll remember seeing some shapes in the front pocket of my Cookie Book.
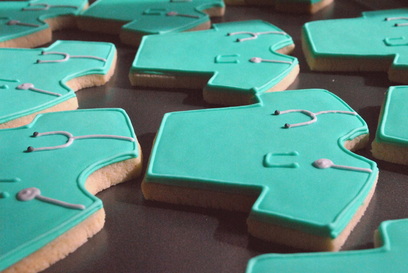
You can see the template in the above picture for my scrub shirt with stethoscope cookies, I have yet to find a cookie cutter that has dimensions that are to my liking. Yes, it takes a while to hand cut 3 dozen of these but in the end I am happier doing this than messing with a shape I don't really like.
Option 2:
The second option is to high-jack a cookie cutter you already have. Now, in my opinion Calleye over at The Sweet Adventures of Sugarbelle is the masters of this. She has an amazing ability to think outside the box and use the cutters that she already has in wonderfully creative ways. This is a talent I am trying to develop and I'll show you an example below.
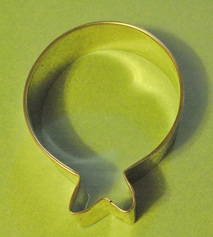
When I first picked up this cookie cutter from Sur la Table, I honestly thought it was a pomegranate. Seriously. My husband is an avid fruit grower (check out his incredible blog!) and I think at that time we had been enjoying the poms he grew. Anyway, I was going to make some fruit themed cookies for his friend and I saw this and thought "oh, wow! I can't believe they make a pomegranate shaped cookie cutter!"...it was in the same bin as the apple, pear etc cutters so it's a conclusion anyone would make, right? Unfortunately, I can't find any pictures of those cookies, but they didn't turn out how I wanted anyway, so maybe I just trashed them :)
Anyway, if you can't tell by now, this is clearly supposed to be a balloon cookie cutter. (yes, it's a horrible picture, I'm using the excuse of kids being sick...that's always a valid excuse, right?)
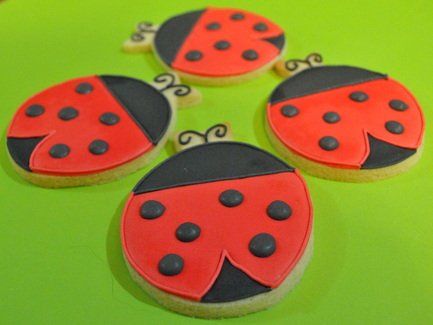
The next time I used it I made ladybugs following Sugarbelle's design.
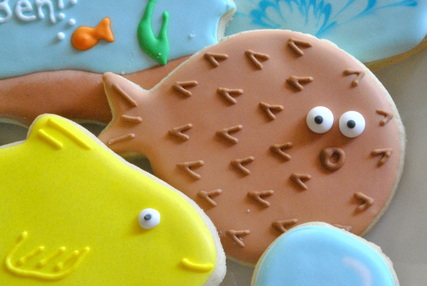
I was pleased with how they turned out but all I could think while cutting out the cookies was "these aren't ladybugs, clearly these are blowfish!". How convenient that my son's birthday party was coming up, he wanted a "shark party" but was happy with the idea of "sea creature" cookies to go along with it. Sharks, as it turns out, are hard for me...he's very understanding for a 4 year old.
I decided that simple would be best for these cookies (this ends up being true for a lot of cookies). I flooded with brown icing, let him dry for the day and then added his spines and mouth using a slightly darker brown. Used a little white to pipe on some eyes and dot them with black icing while the white was still wet. Then I gave him wide eyes and a round mouth to make him look surprised at the fact that you might eat such an adorable little guy :)
Pomegranate, balloon, ladybug, blowfish, all from one 76 cent cookie cutter! The possibilities are really endless when you use your imagination. As I said before, I'm still a relative newbie to all of this and am still working on stretching my imagination with it comes to these things. Hopefully I'll have more fun with this cutter in the future!
Now it's your turn: how have you used your cookie cutters to make something new? Feel free to post a link to your blog to show off your work!

 RSS Feed

