Is it just me, or do all cookie newbies do this? When I started decorating cookies I used only one kind of tip. No, this isn't a post about the fantastic-wonderful-amazingness of PME tips (all true, I assure you) but the shape of the tip. When I started out I used only round tips. Sure, I changed up the size of the tip but honestly, I only used round tips. It really never dawned on me to use anything else, and in hindsight, I wish I had thought of it much sooner.
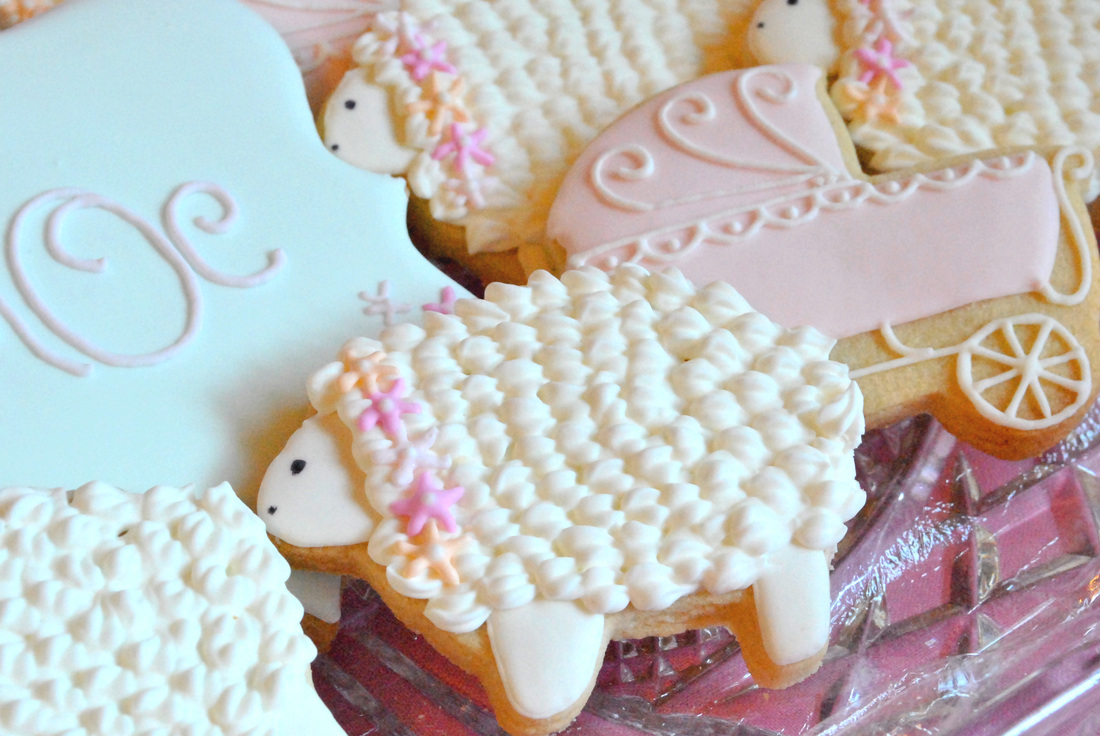
The first time I used something other than a round tip was to do these little lamb cookies for a baby shower cookie plate. I saw these adorable lambs from Marian at Sweetopia and I couldn't wait to try them! I won't go through the steps to do them (check out the link for that), suffice to say I used a Wilton #16 tip. It was an easy way to add dimension and texture.
The first time I used something other than a round tip was to do these little lamb cookies for a baby shower cookie plate. I saw these adorable lambs from Marian at Sweetopia and I couldn't wait to try them! I won't go through the steps to do them (check out the link for that), suffice to say I used a Wilton #16 tip. It was an easy way to add dimension and texture.
Around Christmas-time this year, I was asked to make some cookies for an auction benefiting the choir at one of the local high schools. The theme was something along the lines of Winter Woods, so I wanted to make some simple scenery cookies. I knew that plain triangles for the trees would look too flat and one dimensional, so I decided to again break out of my round-tip-rut and used a Wilton #16 tip.
It was simple enough: pipe a long row for the bottom branches, then add rows of decreasing numbers until you reach the top. If you've never used this kind of tip before, it's pretty simple with a little practice. Squeeze out a bit, release the pressure and pull back. Repeat. The only thing I will add to this is to remember to use very stiff, piping consistency icing. It should hold a peak when you pull a spoon out of it, otherwise, you won't get the dimension and texture you are going for.
I wish now that I had been blogging then and had taken better pictures of the trees to show you...sorry!

I was recently asked to do some birthday cake cookies and I knew that do truly make it look like a cake, it would need some details to make it more three dimensional. Broke out the trusty Wilton #16 tip again to pipe the shell boarder between the layers. Geez, that bottom line is a bit (lot) wonky, huh? That's probably why this was in the left-over group.
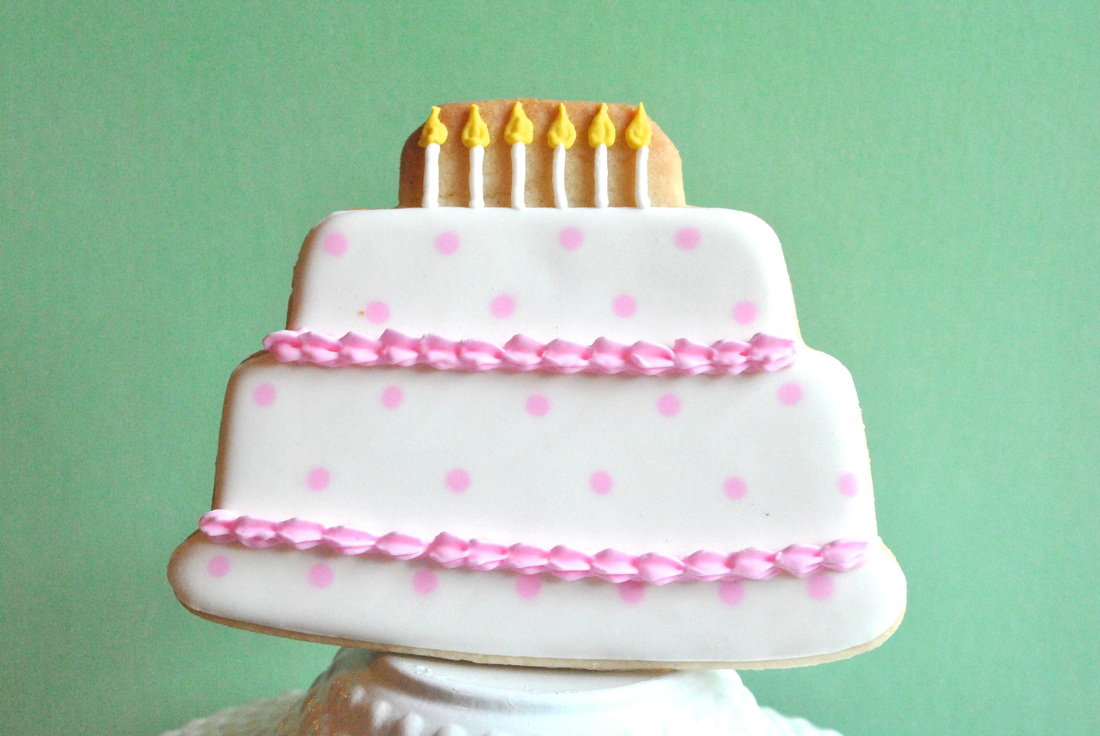
**Random tip of the day: when making cookies for a customer, always, always, always, always make extra!! You never know when one will drop on the floor or you will mess something up (see above wonkiness). It is also good to have a few practice cookies to make sure your design is going to work how you want, or use them to get the spacing and size of your writing correct. And your husband and kids will thank you for that night's dessert :) **
Anyway, where was I? Seriously lost my train of thought because Boy #1 was napping on the couch beside me and fell off. Don't worry, he's fine. He's now sleeping on me, guess that's slightly safer.
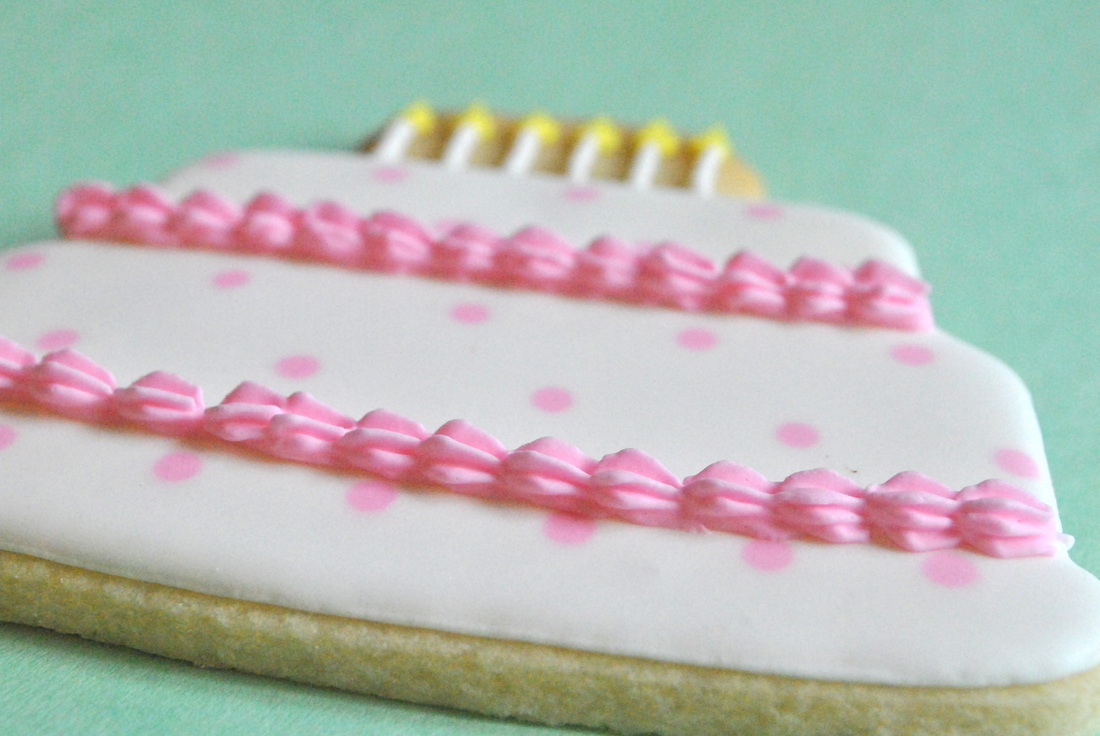
Tips. Yes. Once again, use very stiff icing for this, you need it to hold it's shape. Now, this time I was a good little blogger and took a closeup of the border! Yay, me! Isn't it pretty? See how it stands up and adds depth?
Anyway, where was I? Seriously lost my train of thought because Boy #1 was napping on the couch beside me and fell off. Don't worry, he's fine. He's now sleeping on me, guess that's slightly safer.
Tips. Yes. Once again, use very stiff icing for this, you need it to hold it's shape. Now, this time I was a good little blogger and took a closeup of the border! Yay, me! Isn't it pretty? See how it stands up and adds depth?
It really doesn't take much to make a big change in a cookie. For the birthday cakes, I could have piped a straight, thick line but for about 10 seconds more work I think it looks much nicer.
There are endless options for using different tips to add details to your cookies. So, go play around and see what you can create, and get out of your round-tip-rut!
(So let me have it, was I the only one who didn't think of this when they started cookie-ing?!)
There are endless options for using different tips to add details to your cookies. So, go play around and see what you can create, and get out of your round-tip-rut!
(So let me have it, was I the only one who didn't think of this when they started cookie-ing?!)

 RSS Feed